Calcium chloride is safe when handled properly. The key risks are moisture absorption, contamination during storage, and mislabeling that leads to incorrect concentration assumptions. For laboratories and quality control teams, verifying calcium chloride purity is not optional—it is a routine responsibility that directly affects downstream processes, from road de-icing to food-grade applications.
What makes calcium chloride purity test procedures so difficult to standardize across facilities? The answer lies in the wide range of grades available, the lack of a single universal testing method, and the fact that different applications demand different purity thresholds. A technical-grade product acceptable for dust control may fail food-grade or pharmaceutical requirements.
This article covers the complete workflow for testing calcium chloride purity in a facility setting. It outlines preparation steps, analytical methods, interpretation of results, and common pitfalls that lead to inaccurate readings.

What Is Calcium Chloride and Why Purity Matters?
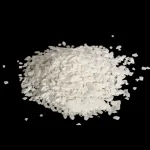
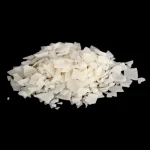
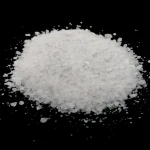
Calcium chloride (CaCl₂) is an inorganic salt composed of calcium and chlorine. It is highly hygroscopic, meaning it absorbs moisture from the air, and exists in several forms: anhydrous (94–97% CaCl₂), dihydrate (74–77% CaCl₂), and liquid solutions (typically 28–42% concentration).
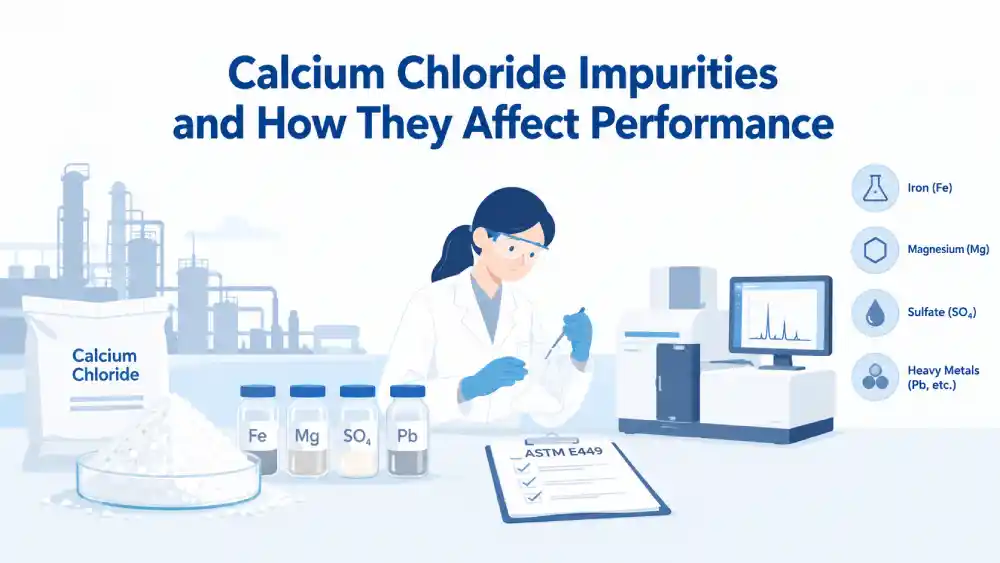
Purity matters because impurities such as magnesium chloride, sodium chloride, and heavy metals can alter performance. In food processing, heavy metal content must remain below regulatory limits. In oil and gas applications, impurities can corrode equipment. In laboratory settings, trace contaminants can invalidate experimental results.
The American Society for Testing and Materials (ASTM) provides standard test methods for calcium chloride, including ASTM E449 for chemical analysis. These standards form the basis for most facility-level purity verification.
How to Prepare Samples for Calcium Chloride Purity Testing
Proper sample preparation is the foundation of accurate results. Inconsistent preparation is the leading cause of repeat testing in quality control laboratories.
Pre-Test Checklist
- Verify the sample container is sealed and labeled with batch number and date
- Record ambient temperature and relative humidity in the testing area
- Calibrate all analytical instruments according to manufacturer specifications
- Prepare fresh distilled or deionized water for solution preparation
- Confirm all glassware is clean, dry, and free of residual chemicals
- Review the material safety data sheet (MSDS) for the specific calcium chloride grade
- Wear appropriate personal protective equipment (PPE), including gloves and eye protection
Step-by-Step Sample Preparation
Step 1: Obtain a representative sample. Use a scoop or thief sampler to collect material from multiple depths of the container. For bulk shipments, sample from at least three locations.
Step 2: Weigh the sample accurately. Use an analytical balance with 0.1 mg readability. Record the exact mass, typically 1–5 grams depending on the expected purity and method used.
Step 3: Dissolve the sample. Transfer the weighed sample to a volumetric flask. Add distilled water to dissolve, then dilute to the mark. Stir until fully dissolved. For anhydrous forms, dissolution may generate heat.
Step 4: Filter if necessary. If the sample contains insoluble matter, filter through a 0.45 µm membrane filter before analysis.
Expected result: A clear, colorless solution ready for titration or instrumental analysis.
How Does Titration Determine Calcium Chloride Purity?
Titration with EDTA (ethylenediaminetetraacetic acid) is the most common wet-chemistry method for determining calcium content in calcium chloride samples. This method is cost-effective, accurate, and suitable for most facility laboratories.
Principle of EDTA Titration
EDTA forms a stable complex with calcium ions. By adding a known concentration of EDTA to a calcium chloride solution containing a suitable indicator, the endpoint is marked by a color change. The volume of EDTA consumed is proportional to the calcium concentration.
Materials and Reagents
- 0.05 M EDTA standard solution
- Ammonia-ammonium chloride buffer (pH 10)
- Eriochrome Black T indicator or Calmagite indicator
- Burette with 0.05 mL graduations
- Erlenmeyer flask (250 mL)
- Distilled water
Procedure
Step 1: Pipette 25 mL of the prepared sample solution into a 250 mL Erlenmeyer flask.
Step 2: Add 5 mL of ammonia-ammonium chloride buffer to adjust pH to approximately 10.
Step 3: Add 3–5 drops of Eriochrome Black T indicator. The solution should turn wine-red.
Step 4: Titrate with 0.05 M EDTA solution while swirling continuously. The endpoint is reached when the color changes from wine-red to pure blue.
Step 5: Record the volume of EDTA used. Calculate calcium chloride purity using the formula:
CaCl₂ purity (%) = (V × M × 110.98 × 100) / (sample weight × 1000)
Where V = volume of EDTA in mL, M = molarity of EDTA, and 110.98 = molecular weight of CaCl₂.
What Is the Gravimetric Method for Calcium Chloride Purity?
The gravimetric method is a reference technique that precipitates calcium as calcium oxalate, then converts it to calcium oxide or calcium carbonate for weighing. This method is more time-consuming but offers high accuracy for laboratory settings.
Step-by-Step Gravimetric Procedure
Step 1: Dissolve a known mass of sample in distilled water.
Step 2: Add excess ammonium oxalate solution to precipitate calcium oxalate.
Step 3: Filter the precipitate using ashless filter paper.
Step 4: Wash the precipitate with dilute ammonium hydroxide solution to remove impurities.
Step 5: Dry and ignite the precipitate in a muffle furnace at 500–600°C to convert calcium oxalate to calcium carbonate or calcium oxide.
Step 6: Cool in a desiccator and weigh. Calculate purity based on the stoichiometric relationship.
This method is suitable for facilities that require traceable results for regulatory submissions.
Is EDTA Titration Better Than Gravimetric Analysis for Calcium Chloride Purity?
| Parameter | EDTA Titration | Gravimetric Analysis |
|---|---|---|
| Typical accuracy | ±0.5% | ±0.1% |
| Time per sample | 15–30 minutes | 4–6 hours |
| Equipment cost | Low | Moderate to high |
| Skill level required | Moderate | High |
| Suitable for routine QC | Yes | Less practical |
| Interference from magnesium | Can be masked | Must be separated |
| Regulatory acceptance | Widely accepted | Reference method |
Choose EDTA titration when:
- You need rapid, routine results for production batches
- Your facility lacks muffle furnace capability
- Magnesium interference is minimal or can be masked
- Cost per test is a primary consideration
Choose gravimetric analysis when:
- You require the highest accuracy for certification
- Your laboratory participates in proficiency testing
- You need a reference method for method validation
- Regulatory requirements specify gravimetric determination
How to Test for Moisture Content in Calcium Chloride
Moisture content directly affects purity calculations because absorbed water dilutes the active ingredient. The loss on drying (LOD) method is the standard approach.
Procedure for Moisture Determination
Step 1: Weigh 2–5 grams of sample in a pre-dried, pre-weighed moisture dish.
Step 2: Place in an oven at 105°C for 2 hours.
Step 3: Cool in a desiccator and weigh.
Step 4: Repeat drying until constant weight is achieved (difference < 0.5 mg).
Step 5: Calculate moisture content:
Moisture (%) = [(initial weight − final weight) / initial weight] × 100
For anhydrous calcium chloride, moisture should typically be below 1%. For dihydrate, the theoretical moisture is approximately 23–25%.
What Are the Common Mistakes in Calcium Chloride Purity Testing?
Avoiding these errors improves reproducibility and reduces wasted reagents.
Using unpurified water. Tap water contains calcium and magnesium that interfere with EDTA titration. Always use distilled or deionized water.
Ignoring temperature effects. EDTA titration is temperature-sensitive. Perform titrations at 20–25°C for consistent results.
Incorrect pH adjustment. If pH is below 10, the indicator does not function properly. Verify buffer addition.
Skipping duplicate tests. Single measurements cannot reveal random errors. Run at least duplicates and calculate relative standard deviation (RSD).
Not calibrating balances. A balance drift of 0.5 mg can cause a 0.1–0.5% purity error depending on sample size.
Using expired reagents. EDTA solutions degrade over time. Check expiration dates and standardize periodically.
How to Interpret Calcium Chloride Purity Results
Interpreting results requires understanding the specification for your intended use.
| Grade | Typical CaCl₂ Content | Key Impurity Limits |
|---|---|---|
| Technical | 90–95% | Heavy metals not specified |
| Food grade | 94–97% | Heavy metals < 10 ppm, arsenic < 3 ppm |
| Pharmaceutical | 95–99% | Heavy metals < 10 ppm, strict microbial limits |
| Laboratory | 99%+ | Trace metals < 1 ppm |
Key Takeaway: A result of 92% CaCl₂ may be acceptable for dust control but rejected for food processing. Always test against the specification for your application.
FAQs
What is the most accurate method for calcium chloride purity testing?
The gravimetric method using calcium oxalate precipitation is considered the most accurate, with typical accuracy of ±0.1%. However, EDTA titration offers sufficient accuracy (±0.5%) for most routine quality control applications and is faster.
How long does a calcium chloride purity test take?
EDTA titration takes 15–30 minutes per sample after preparation. Gravimetric analysis requires 4–6 hours due to precipitation, filtration, and ignition steps. Moisture determination adds 2–3 hours.
Is calcium chloride purity testing safe?
Calcium chloride is safe when handled properly. The key risks are skin irritation from concentrated solutions, eye contact, and dust inhalation. Wear gloves, goggles, and a dust mask when handling anhydrous material. Work in a ventilated area.
Can I test calcium chloride purity without a laboratory?
No. Accurate purity testing requires calibrated analytical balances, burettes, and reagent-grade chemicals. Field test kits exist for approximate concentration checks but lack the precision needed for quality control documentation.
What is the difference between anhydrous and dihydrate calcium chloride purity?
Anhydrous calcium chloride contains 94–97% CaCl₂, while dihydrate contains 74–77%. The difference is water content. When testing, always account for moisture to compare results on a dry basis.
How often should calcium chloride purity be tested?
Test each incoming batch before acceptance. For ongoing production, test at least once per shift or per batch. Retain samples for 12 months for traceability.
What causes low calcium chloride purity results?
Common causes include absorbed moisture during storage, contamination from dirty containers, incomplete dissolution during sample preparation, and expired EDTA titrant. Verify each step before concluding the material is out of specification.
Can magnesium chloride interfere with calcium chloride purity testing?
Yes. Magnesium chloride reacts with EDTA similarly to calcium chloride. Use a masking agent or adjust pH to precipitate magnesium before titration. Gravimetric methods separate magnesium during precipitation.
What documentation is required for calcium chloride purity testing?
Record the sample ID, batch number, date, analyst name, method reference, instrument calibration dates, raw data, calculated results, and any deviations. Retain records for at least 3 years or as required by your quality system.
Where can I find standard methods for calcium chloride purity testing?
ASTM E449 provides standard test methods for calcium chloride analysis. ISO 3237 covers calcium chloride for industrial use. United States Pharmacopeia (USP) provides methods for pharmaceutical-grade material. Always verify the current version of any standard.
Conclusion
Testing calcium chloride purity in your facility requires a disciplined approach to sample preparation, analytical method selection, and data interpretation. The core methods—EDTA titration, gravimetric analysis, and moisture determination—each serve different needs. EDTA titration is the practical choice for routine quality control, while gravimetric analysis provides reference-grade accuracy for certification.
For laboratories and quality control teams, the priority is consistency. Calibrate instruments, use reagent-grade chemicals, run duplicates, and document every step. When evaluating your testing workflow, prioritize method validation and analyst training over speed alone.
For specific applications requiring certified purity levels, consult a qualified analytical chemist who can assess your facility's requirements and recommend appropriate testing protocols.