The way brands approach chemical packaging has evolved. It’s no longer just about putting a product in a bag and shipping it. For hygroscopic materials like calcium chloride, packaging is a critical component of product integrity, shelf life, and brand reputation. A failure at the packaging level can lead to product solidification, customer complaints, and costly returns, eroding the trust you’ve built in the market.
Many brand owners focus intensely on product formulation and sourcing but treat packaging as an afterthought. In practice, packaging is the first physical interaction a customer has with your product and the primary defense against the product’s natural tendency to absorb moisture from the air. This means the right choice directly impacts your bottom line.
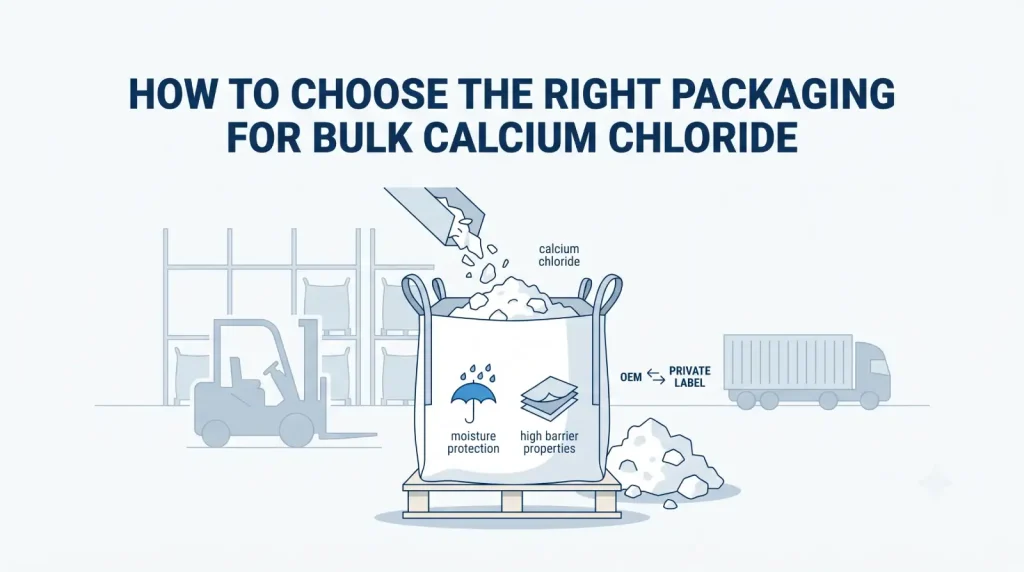
This guide provides a step-by-step framework for selecting, testing, and managing packaging for bulk calcium chloride. We will move beyond generic advice and focus on actionable criteria, specifically examining the decision-making process for OEM vs private label branding and the technical requirements for calcium chloride packaging.
Calcium chloride is safe to package and ship when handled properly. The key risks are moisture ingress causing product solidification and package degradation from the product's own weight and chemical properties. Controlling these two variables is the central theme of every step that follows.
What This Article Covers
- The unique challenges calcium chloride poses to packaging materials
- A detailed comparison of OEM vs private label packaging strategies
- A technical breakdown of packaging materials, from moisture barriers to structural design
- A step-by-step workflow for qualifying a new packaging solution
- A troubleshooting guide for common field failures
- Bottom line: Effective calcium chloride packaging is a custom-engineered system, not an off-the-shelf purchase, and your choice between OEM and private label dictates who controls this critical process.
Prerequisites: What You Need Before Starting
Before evaluating packaging options, ensure you have the following information and resources ready. This preparation will make the selection process significantly more efficient.
- A detailed product specification sheet: You must know the exact form (pellets, flakes, powder), concentration, and any additives in your calcium chloride.
- Target market and sales channel data: Packaging for retail store shelves has vastly different requirements than bulk shipments for industrial de-icing.
- Logistics and storage data: Map out your supply chain to understand the climate conditions (humidity, temperature) the package will face from the filling line to the end-user.
- Brand guidelines and regulatory requirements: Have clear requirements for labeling space, required hazard communication (GHS), and transport certifications (UN rating).
- A cross-functional team: The decision should not be made by procurement alone. Include input from operations, quality control, and marketing.
Step 1: Define Your Product’s Risk Profile
The first step is to thoroughly understand what you are protecting against. Calcium chloride is a highly hygroscopic salt, meaning it actively pulls moisture from the environment. This characteristic is both its functional mechanism and its biggest packaging challenge. Moisture absorption leads to caking, liquefaction, and can compromise the structural integrity of paper-based packaging.
- Moisture sensitivity: How much moisture absorption will cause a functional failure? A product with a 94% purity may have a different tolerance than one with 74% flakes. Quantify this with a moisture vapor transmission rate (MVTR) analysis.
- Physical form and load: Pellets create a different pressure profile in a bulk bag than fine powder. Prills can have sharp edges that cause pinholes in plastic liners under vibration. Bulk bags holding 1,000 kg of material must withstand immense static and dynamic forces.
- Exothermic properties: When calcium chloride dissolves, it generates heat. If moisture penetrates a package, the resulting reaction can create localized hot spots, further damaging the packaging material.
Expected outcome: A one-page risk matrix that prioritizes moisture protection, puncture resistance, and load-bearing capacity for your specific product form.
Step 2: Decipher the OEM vs Private Label Packaging Choice
This is often the most consequential strategic decision. The OEM vs private label framework defines your supply chain control and brand expression. Understanding the distinction is critical before you approach any manufacturer.
What Is OEM Packaging?
In an OEM (Original Equipment Manufacturer) model, you source a product manufactured by another company and package it under your own brand. The OEM produces the calcium chloride to a specific formulation, and you manage the packaging design, procurement, and filling—either at your facility or through a contract packager. This gives you complete control over the packaging system.
What Is Private Label Packaging?
A private label model involves purchasing a pre-packaged, finished product from a manufacturer and applying your brand label to it. The manufacturer controls the packaging selection and filling process. You are buying a market-ready unit, which significantly reduces your operational complexity but limits your ability to customize the packaging structure.
Choose OEM Packaging when:
- Your distribution channel exposes the product to extreme humidity or rough handling, requiring a specialized, high-barrier package.
- You want full ownership of the supply chain and the ability to switch packaging suppliers to drive cost or innovation.
- Your brand differentiator is package performance, such as a resealable stand-up pouch or a specially designed water-soluble unit-dose pack.
Choose Private Label Packaging when:
- Speed to market is your primary objective, and you want to launch a branded product without the capital investment in filling equipment and packaging development.
- Your order volumes are currently too low to meet minimum order quantities (MOQs) for custom-engineered films or bulk bags.
- The manufacturer has a proven, validated packaging system with a track record of zero moisture-related failures.
Step 3: Select the Primary Packaging Material
Once you’ve established who will control the packaging (OEM vs private label), the next step is material selection. This is a technical exercise in matching barrier properties and mechanical strength.
| Material Type | Moisture Barrier | Puncture Resistance | Best Application | Key Limitation |
|---|---|---|---|---|
| Multi-layer Kraft Paper Bags | Poor (reliant on internal liner) | Good | Small to medium-size pellets (25 kg) in controlled storage | Fiber fatigue from product weight; catastrophic failure if inner liner is breached |
| Woven Polypropylene (WPP) Bags | Poor (requires inner liner) | Excellent | Heavy-duty industrial de-icing products (50 kg) | Zero moisture barrier without liner; UV-degradable in sunlight |
| Laminated WPP with PE/PP Liner | Good to Excellent | Excellent | High-value, high-purity products requiring maximum shelf life | Higher cost; more difficult to recycle than single-material structures |
| Rigid FIBC (Bulk Bags) | Depends on liner type | Superior | Bulk calcium chloride shipments of 500-1,250 kg | Requires proper filling and handling equipment; significant storage space |
How Does Multi-layer Construction Impact Performance?
A single layer of polyethylene provides a basic barrier, but optimal protection comes from a composite structure. For example, a film with layers of EVOH (ethylene vinyl alcohol) sandwiched between polyethylene provides an oxygen and moisture barrier that a single PE film cannot match. The outer woven layer provides tensile strength and puncture resistance, while the inner film is engineered solely for chemical resistance and moisture vapor transmission. This functional separation is the core principle of modern flexible packaging for hygroscopic materials.
Step 4: Validate Seals and Closures
More packaging failures occur at the seal than through the flat material. A perfect film is useless if the closure allows ambient humidity to leak in during storage. The seal is the most vulnerable point in the entire system.
How to Test Heat Seals for Integrity
- Standardize seal parameters: Document and control the exact jaw temperature, pressure, and dwell time for heat seals on plastic liners. A 1-second variation in dwell time can be the difference between a hermetic seal and a micro-leak.
- Conduct dye penetration testing (ASTM F3039): This method applies a colored dye to the seal edge to visualize any capillary channels that breach the seal integrity. It is a mandatory quality control step.
- Validate the sift-proof seam: For sewn bag closures, use a crepe tape or hot-melt adhesive over the stitching to prevent fine calcium chloride dust from sifting out and moisture from wicking in through the needle holes.
Why Does Valve Closure Design Matter for Bulk Bags?
The filling spout on a bulk bag is a common failure point. A standard cone-shaped spout that is simply folded and tucked can create a capillary path for moisture. A better design uses a flat, self-sealing valve that closes under the internal pressure of the product. After filling, the spout should be tightly secured with a secondary tie and tucked into a protective pocket. Skipping this step on a bulk calcium chloride bag is a direct path to a solidified, un-dumpable 1,000 kg block.
Step 5: Run a Controlled Field Trial
Laboratory testing is essential, but it cannot perfectly simulate the conditions of a trans-Pacific shipping container or a warehouse in a coastal humid zone. A controlled field trial validates your entire packaging system in the real world.
- Step 5a: Prepare a test batch. Run a minimum production run with the new packaging. Ensure all conditions—product temperature at filling, seal integrity, and pallet stacking pattern—are documented.
- Step 5b: Use data loggers. Place calibrated temperature and humidity data loggers inside the package and on the pallet. This data will correlate environmental conditions with product state.
- Step 5c: Conduct a full logistics cycle test. Ship the palletized product through your most demanding distribution channel. This should include truck transport, cross-docking, and warehouse storage for the full anticipated shelf-life duration.
- Step 5d: Perform destructive testing on return. Unpack the trial units. Visually inspect for caking and take core samples for moisture content analysis. Compare these results against your pre-trial product specifications. A moisture increase from 0.5% to 1.0% might be acceptable, but an increase to 2.0% likely signals a systemic failure.
Expected outcome: A data-backed go/no-go decision, with clear evidence of the packaging’s ability to maintain the product within specification limits through the full distribution cycle.
How to Troubleshoot Common Packaging Failures
Even with a robust qualification process, issues can arise. Here is how to diagnose and fix the most frequent problems.
Symptom: Product caking at the bottom of a bulk bag
- Root cause: Often a micro-leak in the bottom spout seal, allowing moisture to pool and wick upwards.
- Solution: Switch to a reinforced duffle-top/bottom design with a full-length sift-proof barrier. Tighten the tie-off procedure for the discharge spout and add a protective flap.
Symptom: Woven polypropylene outer bag feeling tacky or degrading
- Root cause: The calcium chloride has absorbed moisture, and a small amount of concentrated solution has leached through the inner liner, attacking the WPP’s coating.
- Solution: This is a liner failure, not a WPP failure. Upgrade the inner liner to a thicker gauge (increase from 50 to 100 microns) and specify a chemically resistant LLDPE material. Re-validate the seals.
Symptom: Labels smudging, peeling, or curling
- Root cause: High ambient humidity or slight product dust on the bag surface is preventing proper label adhesion.
- Solution: For paper labels, this is a losing battle. Convert to a polyethylene-based synthetic label with a high-performance, moisture-resistant adhesive. If printing directly on the bag, ensure the surface is cleaned with an air knife before inkjet application.
Symptom: Consumer complaints about difficulty opening and reclosing
- Root cause: A disconnect between industrial packaging priorities (strong seal) and user experience. A seal strong enough to survive shipping can be impossible to tear open without tools.
- Solution: For retail-size bags, incorporate a laser-scored "easy-open" tear strip. Adding a press-to-close zipper behind the main heat seal provides reclosability and preserves the product after initial use, a significant brand differentiator. A private label product with this feature can significantly outperform a competitor’s hard-to-close OEM bag.
Conclusion
Selecting the right packaging for bulk calcium chloride is a risk management exercise as much as a purchasing decision. The entire process, from defining your product’s risk profile to running a final field trial, must systematically address the threat of moisture and physical stress.
The key takeaways are: first, understand the critical structural difference between OEM and private label models, as this defines your control over the packaging system. Second, focus relentlessly on seal integrity, the most common point of failure. Finally, never substitute a laboratory test for a real-world supply chain trial.
For brands looking to exercise complete control over their calcium chloride product’s performance and shelf life, a partner that understands technical packaging becomes invaluable. XRD CHEMICAL offers deep expertise in the material science and logistics needed to keep your product dry and free-flowing from production line to end-user application.
FAQs
What is the safest way to package bulk calcium chloride?
The safest way is to use a dual-layer system: a chemically resistant, thick-gauge polyethylene inner liner with a hermetically sealed valve, encased in a high-strength woven polypropylene outer bag. This separates the functions of chemical containment and mechanical strength, reducing the risk of a single-point failure. Proper hazard communication labels and UN-certified packaging are mandatory for transport.
How long can you store calcium chloride in a sealed bag?
When stored in an intact, high-barrier sealed package under cool, dry conditions, calcium chloride can maintain its specified properties for up to 12-24 months. The critical variable is not the product's inherent shelf life, but the packaging's ability to maintain an internal environment below the product's critical relative humidity. Data loggers during storage can verify this.
OEM vs private label packaging: Which is better for my brand?
It depends on your brand’s strategy. Private label packaging offers speed and reduces capital expenditure, which is better for quickly testing a market. OEM packaging gives you complete control over material quality and package design, which is better for building a long-term brand around performance and innovation. The "better" choice is the one that aligns with your supply chain capabilities and brand identity.
Can you use a standard FIBC for calcium chloride?
No, a standard, unlined Flexible Intermediate Bulk Container (FIBC) is not suitable. You must specify a Type B or Type C FIBC with an integral, anti-static liner that has been validated for low moisture vapor transmission. Using a standard bag will almost certainly result in the entire contents solidifying into a single, unmanageable mass, especially during sea freight.
What type of bag seal is best for preventing moisture in calcium chloride?
A heat-sealed, tape-backed seam is the most effective closure for small to medium bags. For bulk bags, a flat, self-sealing filling spout secured with a heavy-duty cable tie and tucked into a waterproof protective pocket offers the best protection. The goal is to eliminate any straight-line capillary path for humid air.
Is a moisture-proof inner liner necessary for calcium chloride?
Yes, a moisture-proof inner liner is not a luxury; it is the primary functional barrier. Without it, the product will actively absorb atmospheric moisture, leading to caking, weight gain, and eventual bag degradation. The liner’s Moisture Vapor Transmission Rate (MVTR) is the single most important technical specification of the entire package.
How do you properly seal a bulk bag of calcium chloride?
Properly sealing a bulk bag involves five steps:
- Collapse the filling spout to expel excess air.
- Twist the spout tightly and double it over on itself.
- Secure the folded spout with a tamper-evident, heavy-duty plastic cable tie.
- Wrap the secured spout with a waterproof adhesive tape.
- Tuck the entire wrapped spout into the dedicated safety pocket on the bag.
What are signs of packaging failure for calcium chloride?
The most obvious signs are visual: hardened, caked product inside the bag, liquid pooling at the bottom, or a swollen, distorted bag shape from gas release. On the bag itself, look for stretched fabric, broken stitching on seams, or discoloration. A test is to place a bag on a clean surface; any powder leakage indicates a sift-proof failure.
Why does my calcium chloride bag feel hot?
A hot bag is a strong indicator of moisture ingress. When calcium chloride absorbs water, the dissolution process is highly exothermic and releases a significant amount of heat. A warm spot on a bag’s surface is a clear, non-invasive diagnostic sign that a seal has been compromised and the product inside is chemically reacting.
How should I store packaged calcium chloride to ensure maximum shelf life?
To ensure maximum shelf life, store packaged calcium chloride as follows:
- Store on intact pallets in a cool, dry, well-ventilated warehouse.
- Keep the product away from sources of direct heat and protect it from direct sunlight to prevent UV degradation.
- Never double-stack heavy FIBC bags, as this can crush lower bags and cause liner pinholes.
- Implement a first-in, first-out (FIFO) inventory rotation system to manage batch age.