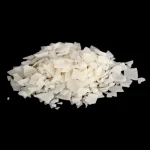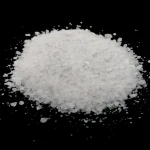
Winter road maintenance is a constant battle against time and temperature. Municipal teams face the immense pressure of keeping critical transportation networks open while managing tight budgets and environmental concerns. Traditional approaches using rock salt (sodium chloride) often fail when temperatures plummet below its effective range, leaving road crews scrambling for alternatives that actually work in extreme cold.
The challenge isn't just about melting ice; it's about restoring safe driving conditions rapidly and cost-effectively. When a storm hits, the public expects clear roads, but the tools available aren't always up to the task. Applying the wrong material or using the wrong method leads to wasted resources, repeat applications, and dangerous roadways.
What makes calcium chloride a fundamentally different tool for road deicing? The answer lies in an exothermic reaction that generates heat upon contact with moisture, allowing it to melt ice at temperatures where other materials become inert. This guide will walk you through exactly how to apply it effectively, from pre-treatment strategies to post-storm evaluation.
Calcium chloride is safe and highly effective for deicing when handled properly. The key risks are corrosion to unprotected metals and potential skin or eye irritation from direct contact with the concentrated material. When stored correctly, applied at recommended rates, and used with standard personal protective equipment, these risks are easily managed, making it a practical choice for municipalities.
What This Article Covers
- How calcium chloride's heat-generating reaction differs from other deicers
- A step-by-step workflow for pre-storm, during-storm, and post-storm application
- Key equipment calibration and safety protocols
- Troubleshooting common application problems
- Bottom line: Mastering calcium chloride application means faster ice melt at lower temperatures, leading to safer roads with less total material.
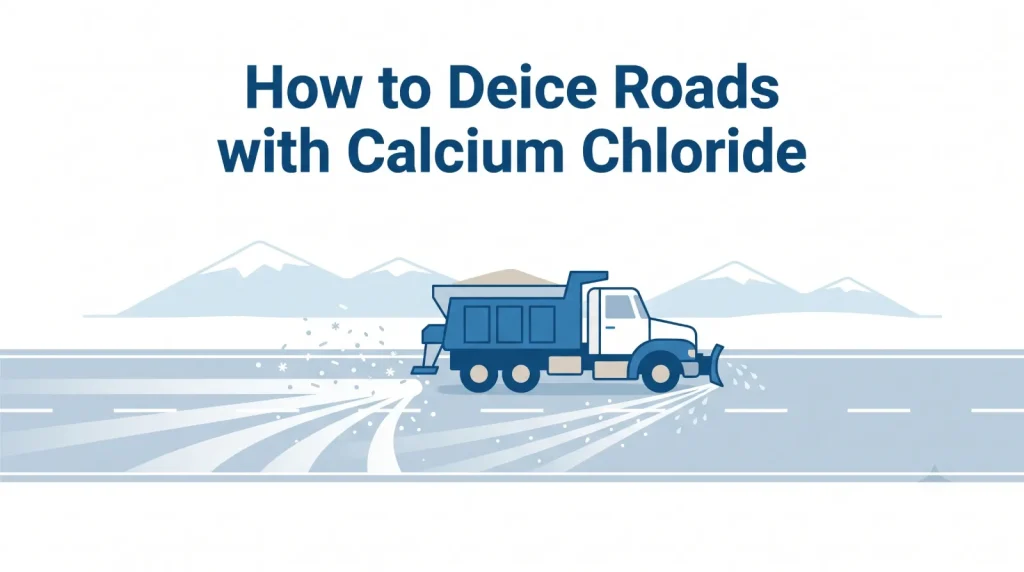
How Does Calcium Chloride Deicing Work?
Understanding the mechanism is crucial for proper application. The process is driven by three distinct properties: hygroscopy, exothermy, and freezing point depression.
When calcium chloride pellets or liquid brine come into contact with ice or snow, they immediately begin absorbing moisture from the environment. This is its hygroscopic nature. The dissolution process is exothermic, releasing a significant amount of heat. Calcium chloride can release up to 60 BTUs of heat per pound of material as it dissolves, which instantly jumpstarts the melting process.
This melted water then forms a brine with the remaining calcium chloride. The resulting solution has a much lower freezing point than pure water. A concentrated calcium chloride solution can remain liquid at temperatures as low as -25°F (-32°C), far below the effective limit of rock salt, which stops working reliably around 15°F (-9°C). This three-stage mechanism—moisture absorption, heat release, and extreme freezing point depression—makes it a powerful tool for road deicing.
Why Calcium Chloride Outperforms Rock Salt in Extreme Cold
The most critical factor in deicer selection is temperature. Every product has a practical working range, and stepping outside it means wasted time and material.
| Deicer | Effective Temperature Range | Melting Speed (Relative) | Primary Mechanism |
|---|---|---|---|
| Calcium Chloride | Down to -25°F (-32°C) | Fast | Exothermic reaction + freezing point depression |
| Rock Salt (Sodium Chloride) | Down to 15°F (-9°C) | Moderate | Endothermic dissolving + freezing point depression |
| Magnesium Chloride | Down to -13°F (-25°C) | Moderate-Fast | Moderate exothermic reaction |
| Urea | Down to 25°F (-4°C) | Slow | Endothermic dissolving |
The key takeaway is not just the lower temperature range, but the speed. Because calcium chloride generates its own heat, it bores through ice layers faster, penetrating to the road surface to break the bond between ice and pavement. This undercutting action is the most critical phase of effective deicing, as it allows for mechanical removal by plows.
How to Apply Calcium Chloride for Road Deicing
A systematic approach ensures that every application achieves maximum effectiveness with minimal waste. This workflow is divided into three critical phases.
Step 1: Pre-Storm Anti-Icing
Anti-icing is a proactive strategy. The goal is to prevent ice from bonding to the pavement in the first place, which makes plowing significantly easier and reduces the total amount of deicer needed.
- Purpose: Apply a brine solution to dry pavement 1-2 hours before a predicted storm.
- Application Rate: A typical liquid brine application rate is 10-20 gallons per lane mile.
- Expected Result: A thin, invisible barrier forms that prevents initial snowfall or freezing rain from bonding. When plows pass, the road clears to bare pavement more effectively.
Step 2: During-Storm Deicing
Once accumulation begins, the objective shifts to breaking the ice-pavement bond and enabling mechanical removal.
- Purpose: Apply solid calcium chloride pellets or flakes to roadways during a storm, typically after plowing.
- Application Rate: For solid flake, apply at 200-400 pounds per lane mile for light to moderate conditions. Increase to 500-800 pounds per lane mile for heavy ice or extreme cold below 0°F (-18°C). Never exceed 800 lbs per lane mile in a single application to manage environmental runoff.
- Expected Result: Pellets will bore through the ice pack, melting downward to the road surface. The action of traffic will then help circulate the brine, further breaking up the ice layer from beneath, a process known as undercutting.
Step 3: Post-Storm Evaluation and Cleanup
After the storm passes, the job isn't finished. Proper evaluation closes the loop on material management.
- Purpose: Inspect roadways for refreeze potential, check catch basins for excessive material buildup, and document performance metrics.
-
Key Actions:
- Monitor road surface temperatures, especially on bridges and overpasses, for at least 3 hours after final application.
- Conduct visual inspections of salt sheds and loading areas for any spilled material that should be reclaimed.
- Record the total material used, effective temperature range during the event, and observed results to refine application rates for future storms.
Pre-Application Checklist for Municipal Crews
Before loading a single truck, complete this verification list to ensure operational readiness and safety compliance.
- Calibrate spreader controls to the planned application rate and verify with a catch test on the auger and spinner.
- Inspect all PPE, including chemical-resistant gloves, safety goggles, and long sleeves, and ensure they are worn by all loading personnel.
- Verify current pavement temperature, not just air temperature, using an infrared thermometer to confirm you are within the effective range.
- Check the weather forecast for the next 6 hours to anticipate any changes in precipitation type or temperature.
- Confirm brine concentration if using liquid solutions, using a hydrometer to ensure it’s within the target range (typically 30-35% concentration).
- Inspect the truck's underbody for any signs of rust or corrosion and ensure all hydraulic lines are leak-free to prevent fluid contamination.
Common Troubleshooting for Calcium Chloride Application
Even with a solid plan, field conditions can cause unexpected results. Here’s how to diagnose and fix the most common issues.
Symptom: Wet-looking but not melting ice after application
- Solution: The application rate is likely too low for the temperature. The material is forming a weak brine but quickly becoming diluted and re-freezing. Increase the application rate by 100-150 lbs per lane mile, targeting a faster, more concentrated brine generation.
Symptom: Refreeze within 1-2 hours of a successful melt
- Solution: Diluted brine has a higher freezing point. The initial melt was successful, but the solution was too spread out and cooled down. A light follow-up application of calcium chloride flakes at a "maintenance" rate of 100-150 lbs per lane mile will re-concentrate the brine and prevent refreeze.
Symptom: Clogged spreader chutes
- Solution: Calcium chloride is highly hygroscopic; it absorbs moisture and can cake or bridge in the hopper. Ensure all tarps are secure and fully closed when not loading. If clogging occurs, do not use a metal rod to clear the chute manually while the auger is running. Use a hydraulic hopper vibrator to break the bridge, or safely power down the equipment to clear it.
Conclusion
Deicing roads with calcium chloride is a technically demanding but highly effective process centered on exploiting its unique exothermic reaction. By mastering the three-phase workflow—pre-storm anti-icing with brine, during-storm deicing with pellets at precise rates, and post-storm evaluation—municipal teams can maintain safer roads in conditions where other materials simply fail.
The key is to shift from a reactive "salt after snow" mindset to a proactive "prevent the bond" strategy. When evaluating your winter maintenance program, prioritize materials and methods that work fastest at the coldest temperatures your region experiences, not just the most familiar option.
For specific application rate calibration based on your unique fleet and bridge infrastructure, a qualified winter maintenance engineer can provide customized guidance. The foundation, however, remains the same: apply the right material, at the right rate, at the right time.
FAQs
What is the effective temperature range of calcium chloride for deicing?
Calcium chloride remains effective for road deicing at temperatures far below other common materials. It can melt ice at temperatures as low as -25°F (-32°C), which is significantly lower than the 15°F (-9°C) limit of rock salt. This wide range makes it the preferred choice for regions that experience extreme cold snaps.
How does calcium chloride melt ice faster than rock salt?
The speed difference comes from an exothermic reaction. When calcium chloride dissolves, it releases heat, generating up to 60 BTUs per pound, which accelerates melting. In contrast, rock salt requires heat from the environment to dissolve, making it an inherently slower process. This heat generation allows calcium chloride to bore through ice and break the bond to the pavement more rapidly.
What is the correct application rate for calcium chloride flakes?
The application rate for solid calcium chloride flakes varies by condition and is a critical factor in road deicing efficiency. A systematic approach to rate selection involves three key tiers:
- For anti-icing brine: 10-20 gallons per lane mile of a 30-35% solution.
- For light to moderate snow/ice: 200-400 pounds of dry flake per lane mile.
- For heavy ice or sub-zero conditions: 500-800 pounds per lane mile.
Is calcium chloride corrosive to vehicles and infrastructure?
Yes, all chloride-based deicers, including calcium chloride, are corrosive to unprotected metal. However, the risk can be managed effectively. The corrosion mechanism is electrochemical and requires an electrolyte, so proper practices are essential:
- Applying the minimum effective rate reduces chloride ion availability.
- Washing vehicles and equipment regularly removes residual salt from surfaces.
- Using corrosion-inhibitor additives in liquid formulations can significantly slow the reaction.
Is pre-wetting rock salt with calcium chloride more effective?
Yes, pre-wetting rock salt with a calcium chloride brine solution is a highly effective best practice. It jumpstarts the melting process by providing the moisture needed for the salt to dissolve, reduces bounce and scatter from the road surface, and lowers the overall effective temperature of the blend. This technique combines the cost-effectiveness of salt with the performance boost of calcium chloride.
How should calcium chloride be stored to prevent caking?
Proper storage of calcium chloride is essential to prevent it from absorbing atmospheric moisture and solidifying into a hard, unusable mass. The storage environment is the primary control factor.
- Always store in a dry, covered structure, like a salt shed with a concrete floor.
- Keep the product in its original, sealed packaging until it's ready to be loaded.
- Ensure stockpiles are covered with waterproof tarps that are fully secured against wind and rain.
When should you use liquid calcium chloride instead of solid pellets?
Liquid calcium chloride brine is ideal for anti-icing before a storm and for pre-wetting solid materials, while solid pellets are better for breaking through established ice during and after a storm. The decision matrix is based on timing:
- Choose liquid brine when: you are applying to dry pavement 1-2 hours before a forecasted snow or freezing rain event.
- Choose solid pellets when: an ice layer has already formed and you need to penetrate it to reach the road surface for undercutting.
Is calcium chloride safe for concrete roads and sidewalks?
Yes, calcium chloride is generally safe for high-quality, air-entrained concrete that is fully cured. Unlike rock salt, it does not chemically attack concrete. The primary physical risk is a freeze-thaw cycle issue, which is not unique to calcium chloride.
- It does not amplify freeze-thaw damage more than any other deicer if the concrete is poorly air-entrained.
- It is less chemically aggressive toward cured concrete than magnesium chloride or ammonium-based deicers.
- Air-entrained, properly finished concrete is the standard for resisting all types of deicer damage.
How long does it take for calcium chloride to start melting ice?
One of the primary advantages for road deicing is the rapid action of calcium chloride. It begins melting ice almost immediately upon contact due to its hygroscopic nature, which draws in the moisture needed to initiate the exothermic reaction. This initial activity can be observed within minutes, and in moderate conditions, it can penetrate a quarter-inch of ice in 15-30 minutes.
What personal protective equipment is needed when handling calcium chloride?
Safe handling of calcium chloride for road deicing requires standard chemical PPE. While it is not highly toxic, it is a skin and eye irritant, especially in its concentrated flake or pellet form. A complete PPE kit for handling operations must include:
- Chemical-resistant gloves (e.g., neoprene or nitrile) to prevent skin irritation.
- Safety goggles or a full-face shield to protect against dust and splashing.
- Long-sleeved shirts and full-length pants to minimize exposed skin.
- Dust masks when handling fine powders in poorly ventilated areas.